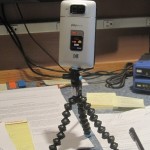
 For all you bloggers and others who love to create online videos, this may be the camera for you. The Kodak Playtouch usually sells for a little less than $200 but can now be found for right around $100 on Wal-Mart the day I am writing this review. Because of the low price and the results I have had with testing the Kodak Playtouch, I went ahead and purchased one for myself.
Video Camera Criteria
Initially, I began looking for a handheld video camera that was reasonably priced that would allow me to create good quality video content. Some of my main requirements included it being handheld and easily carried with me no matter where I went (one that could easily fit into my pocket like most cellphones.) I wanted to be able to add an external mic to improve audio quality since I really hate those videos that are hard to hear even when you turn the sound all the way up. In addition, I also wanted to eventually be able to add a simple wide angle lens.
Finally, I wanted the video camera to be HD, geared towards online video creation, and compatible with any of my computer systems including Windows, Mac, and Linux (especially Linux since I use that system for most of my blogging and website design work.)
Three cameras appeared to fit the above requirements. Those handheld video cameras included the GoPro HD Hero2, the Zoom Q3HD, and the Kodak Playtouch. I went with the Kodak Playtouch for a couple of reasons. First, it was more reasonably priced and fit into my budget. (I may try the Zoom or the GoPro video cameras in the future as my business grows.) Secondly, I went with the Playtouch because Kodak, specifically Bryony Fuller from Kodak, was very responsive to my request for a Playtouch to review. Neither Zoom or GoPro responded to the review requests. If you have any input on either of those two cameras, though, please leave a comment with your insights on them.
My Thoughts on the Kodak Playtouch
Recording Features
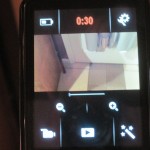
 When I received the unit, one of the things I noticed first was that the portion of the LCD screen dedicated to viewing was very small. The rest of the LCD screen was used up by the touch screen controls. While I like the touchscreen controls, it would be nice to have the whole LCD screen dedicated to the recording process like it is when you are playing back a recorded video on the built-in LCD screen. At the very least, a larger portion of the LCD screen should be dedicate to viewing the recording process.
Before reviewing the Kodak Playtouch, I read and watched a number of reviews on the Playtouch that stated the the prior model Zi8 had better quality video. I have never used a Zi8, but from my current use of the Kodak Playtouch, I do not see an issue with the Playtouch’s video quality. I would not compare it to higher-end video cameras, but for the type of video camera it is and the purpose of the it, I think it is more than adequate for those who create online video content.
I have to this point created video in both the HD settings as well as the WVGA (which is the lowest setting) and have found the quality adequate for my purposes. I use Openshot video editor a lot on my Linux systems and have actually found the WVGA setting to be the better video using Openshot Video Editor. I will add a review of Openshot video editor in a future article for all you open-source application users.
When I tested the Playtouch internal mic in a quiet office, sound quality was adequate. However, at sporting events or locations with a lot of background noise, sound quality was not as good as I would have liked. The internal mic is mono and not stereo so I would recommend the use of an external mic to improve the clarity of voices on any video you create, especially YouTube videos. I tried a number of external mics and will discuss the ones I found to be most beneficial in another review.
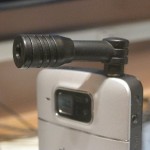
 Although it is helpful to have the capabilities of adding an external mic for such a camera, the location of the external mic port is on the top of the Playtouch which is not the best position for it. When a corded mic is used, the cord often gets in the way of the camera lens. Positioning the mic port on the side of the camera would reduce this problem and be a convenient position for both corded and non-corded external mics.
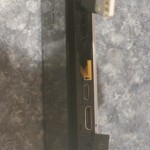
From a blogger’s perspective, it is difficult to know whether you are positioned correctly related to the camera when you are recording yourself with no assistance. I tried connecting the Playtouch to my computer LCD monitor to view myself while I recorded myself, but this did not work. I also used all the Playtouch’s external connections including the HDMI and composite video, but they will only allow the playback of recorded video, not viewing video while it is being recorded. From a blogger’s perspective, it would be nice to be able to view what the video camera sees while you are recording. Being able to connect it to an external monitor or at least having a flip open LCD screen would be a couple ways of resolving this issue. Not a deal breaker but those capabilities would definitely be an advantage for bloggers.
For a video camera, on-board recording space is very limited and does not allow much recording time (how much depends on the video resolution). A decent size SD Card is an easy fix for this problem. HDMI and composite video cables are conveniently included with the purchase of the camera. These cables allow the camera to be connected to a television or LCD monitor for easy playback and viewing of the pictures or videos on the Playtouch.
The Playtouch can also be used for taking pictures with the built-in 5-megapixel camera. Although I did not find the built-in camera to be good for taking action shots such as sporting events, the camera did work well for still pictures. I would recommend that when using the Playtouch for either video or pictures, if you don’t use a tripod, use both hands to stabilize the camera. The shots come out better this way because while the Playtouch does have some image stabilization, it still has a way to go before it can be compared to the image stabilization of most full-size video cameras.
I would also recommend when using the Playtouch for taking video, that you set the zoom lens where you want it before shooting because, at times while using the zoom feature, the playback appeared jumpy. I think this occurred for two reasons: first, the zoom feature does not work as smoothly as it could, and secondly, the use of the zoom usually required me to take one hand off the camera to operate the zoom feature. Either way, as I have continued to use the Playtouch, I have been able to reduce the jumpiness of the zoom feature.
Playback and Editing
The Kodak Playtouch comes with built-in video editing capabilities which are limited in scope but a nice feature if you are trying to post a quick video to Facebook, YouTube, or other social media site. In addition, when you plug the Playtouch (via the built in USB arm) into a Mac or Windows computer, you will be prompted to install the Kodak’s video sharing software (Kodak Camera Setup App) so you can upload the video or picture directly to YouTube, Facebook, Flickr, Kodak Gallery, Orkut, or email it to others when you transfer the videos to your computer. I installed this application on a Mac, and the process was easy.
 The built-in USB arm on the Kodak Playtouch allows you to easily connect to your computer depending where your USB port is located so it would be nice to have the optional USB extension cable included with the Playtouch when purchased. I had a USB extension cable and found that it came in handy depending on which computer I was using to connect the Playtouch.
When you connect the Kodak Playtouch to a Windows computer, you will also be prompted to download and install Arcsoft Mediaimpression software which allows you to edit, organize and share your videos and pictures. The installation of this software on a Windows system also went easily with no issues.
For all you Linux lovers out there, I also connected the Playtouch using the USB arm to one of my Linux systems, and it easily read it as a flash drive. This allowed me to open the video/picture folder and copy the picture or video to my Linux computer. The videos are in MP4 format and easily recognized and played by Linux. I also used Openshot video editor on my Linux computer to edit the videos taken by the Playtouch.
Actually, no matter what operating system you use, the Playtouch was recognized by the computer as an external flash drive, which allowed easy copying of the videos or pictures to the respective computers. This means you do not have to install any of the software that comes with the Playtouch to use it unless you want to.
One last item I would say about the Kodak Playtouch is that the camera is fairly intuitive, but more detailed instruction than what was included in the manual would have been helpful at times. Just knowing what size the external mic port is without having to go online to find out would have been beneficial when trying to find an external mic for the Playtouch. Again, nothing major but minor improvements would make this an even better camera.
Conclusions
In my opinion this is a good entry-level video camera for creating online video content. Whether for a business or for personal use, the Playtouch allows you to take good video and pictures to post online. While I noted a number of things I would like to improve on the camera or that could be included with the camera, none of my complaints are deal breakers. I like the camera and find it is good for basic online video creation and can be easily stuck in my pocket so it is available for that unexpected shot when I am out and about. Please leave your comments regarding the Kodak Playtouch or about other cameras you have used and would or would not recommend.
Which wireless lavalier mike to you use or recommend with the PlayTouch?
On the video review of the Kodak Playtouch on our YouTube channel I used the Telex R-10 receiver with the B-10 transmitter. We have tested a number of mics with this camera and will be coming out soon with an article dedicated to just what we found worked and did not work as far as wired and wireless mics for the Kodak Playtouch. Thanks for the comment.
Wondering if you had any updates about this as I did not see a follow up article and I need a recomendation for an external mic to use with the Kodak Play Touch.
Sorry about that I have been meaning to write a follow-up to that article. I have been using a couple older Telex R-10 wireless mics that have worked out very well even without the use of a Behringer Xenyx 802 mixer. The mics are Telex B-10 (body mics). Let me know if that helps. I have tried some other wired and wireless mics but these have worked out the best for me with the kodak playtouch.
I am going to do a research project (video recording family interaction) with the Kodak Playtouch, but we want to invest in a wireless external mic. I could really use this mic review you mention. Can you give a couple quick tips?
Sorry have not got that together yet but send me an email through my contact form and I will shoot you some information on which ones I used etc.